
torch setup basics
Outdoor torches are the easiest way to change the mood of a backyard without hiring an electrician. I've found that even a few cheap bamboo stakes can make a patio feel like a private retreat, provided you don't set your fence on fire in the process.
This guide will walk you through everything you need to know about installing patio torches safely and effectively. We’ll cover fuel options, torch types, placement considerations, assembly instructions, and troubleshooting tips. But before we get started, let’s emphasize one thing: safety is paramount. Working with open flames requires caution and a clear understanding of potential hazards.
fuel types and burn times
You have three real choices: citronella, paraffin, or propane. Citronella is the standard for backyards, but don't expect it to be a magic shield. In my experience, it keeps the mosquitoes at bay for about four hours, but a stiff breeze ruins the effect immediately.
Paraffin oil is a more economical option and produces a brighter, cleaner flame. It doesn’t have any inherent insect-repelling properties, but it can be combined with scented oils for a more pleasant experience. Paraffin oil generally burns for 8-12 hours, making it a good choice for longer events. Liquid propane, used in larger fire bowls and some torches, offers the longest burn time – often exceeding 20 hours on a full tank – but requires more careful handling and storage.
Newer fuel blends are appearing on the market, often combining different oils and additives to enhance burn time or insect-repelling capabilities. These can be worth exploring, but always read the manufacturer's instructions carefully. Always store fuels in a cool, dry, well-ventilated area, away from heat sources and flammable materials. A locked cabinet is ideal. Never store fuel indoors.
- Citronella oil lasts 4-6 hours and offers mild mosquito protection.
- Paraffin Oil: 8-12 hours burn time, brighter flame, low cost, no insect repellent.
- Liquid Propane: 20+ hours burn time, highest heat output, requires careful storage, higher initial cost.
Torch Fuel Comparison
| Cost per Gallon (USD) | Burn Time (approximate) | Scent Strength | Mosquito Repellent Effectiveness | Safety Concerns |
|---|---|---|---|---|
| $15 - $30 | 6-8 hours | Mild, often lemony | Medium | Flammable; requires careful handling and placement away from combustibles. |
| $10 - $20 | 8-12 hours | Generally odorless | Low | Flammable; potential for soot and smoke. |
| $20 - $40 | 10-20+ hours (depending on torch size) | Odorless | High (due to heat output) | Highly flammable; requires proper tank connection and ventilation; potential for leaks. |
| $25 - $35 (Citronella blends) | 5-7 hours | Strong, Citronella focused | Medium-High | Flammable; potential skin irritation with direct contact. |
| $12 - $22 (Paraffin blends) | 7-10 hours | Variable, depending on added fragrance | Low-Medium | Flammable; can produce significant smoke if not high quality. |
| $30 - $50 (Propane refills) | 15-30+ hours | Odorless | High (heat dispersal) | Flammable gas; requires careful storage and handling of tanks. |
Illustrative comparison based on the article research brief. Verify current pricing, limits, and product details in the official docs before relying on it.
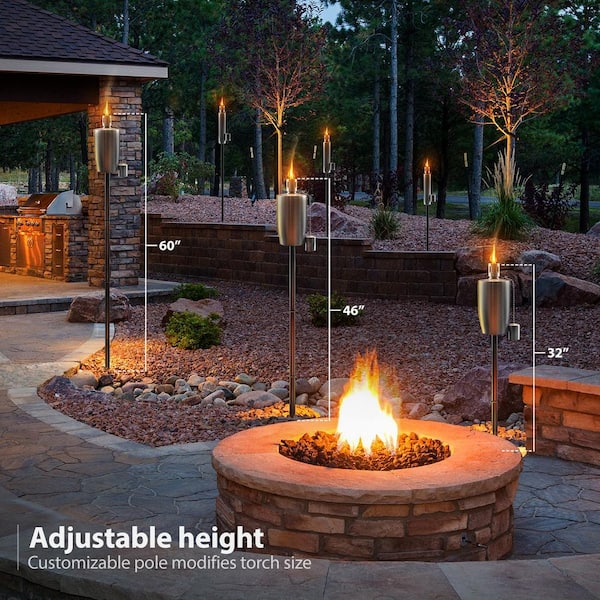
picking a torch style
The type of torch you choose will depend on your desired aesthetic and the specific area you want to illuminate. Traditional tiki torches evoke a tropical vibe and are best suited for creating a festive atmosphere in backyards or patios. They’re generally the most affordable option, but bamboo torches require more frequent replacement as the material deteriorates over time.
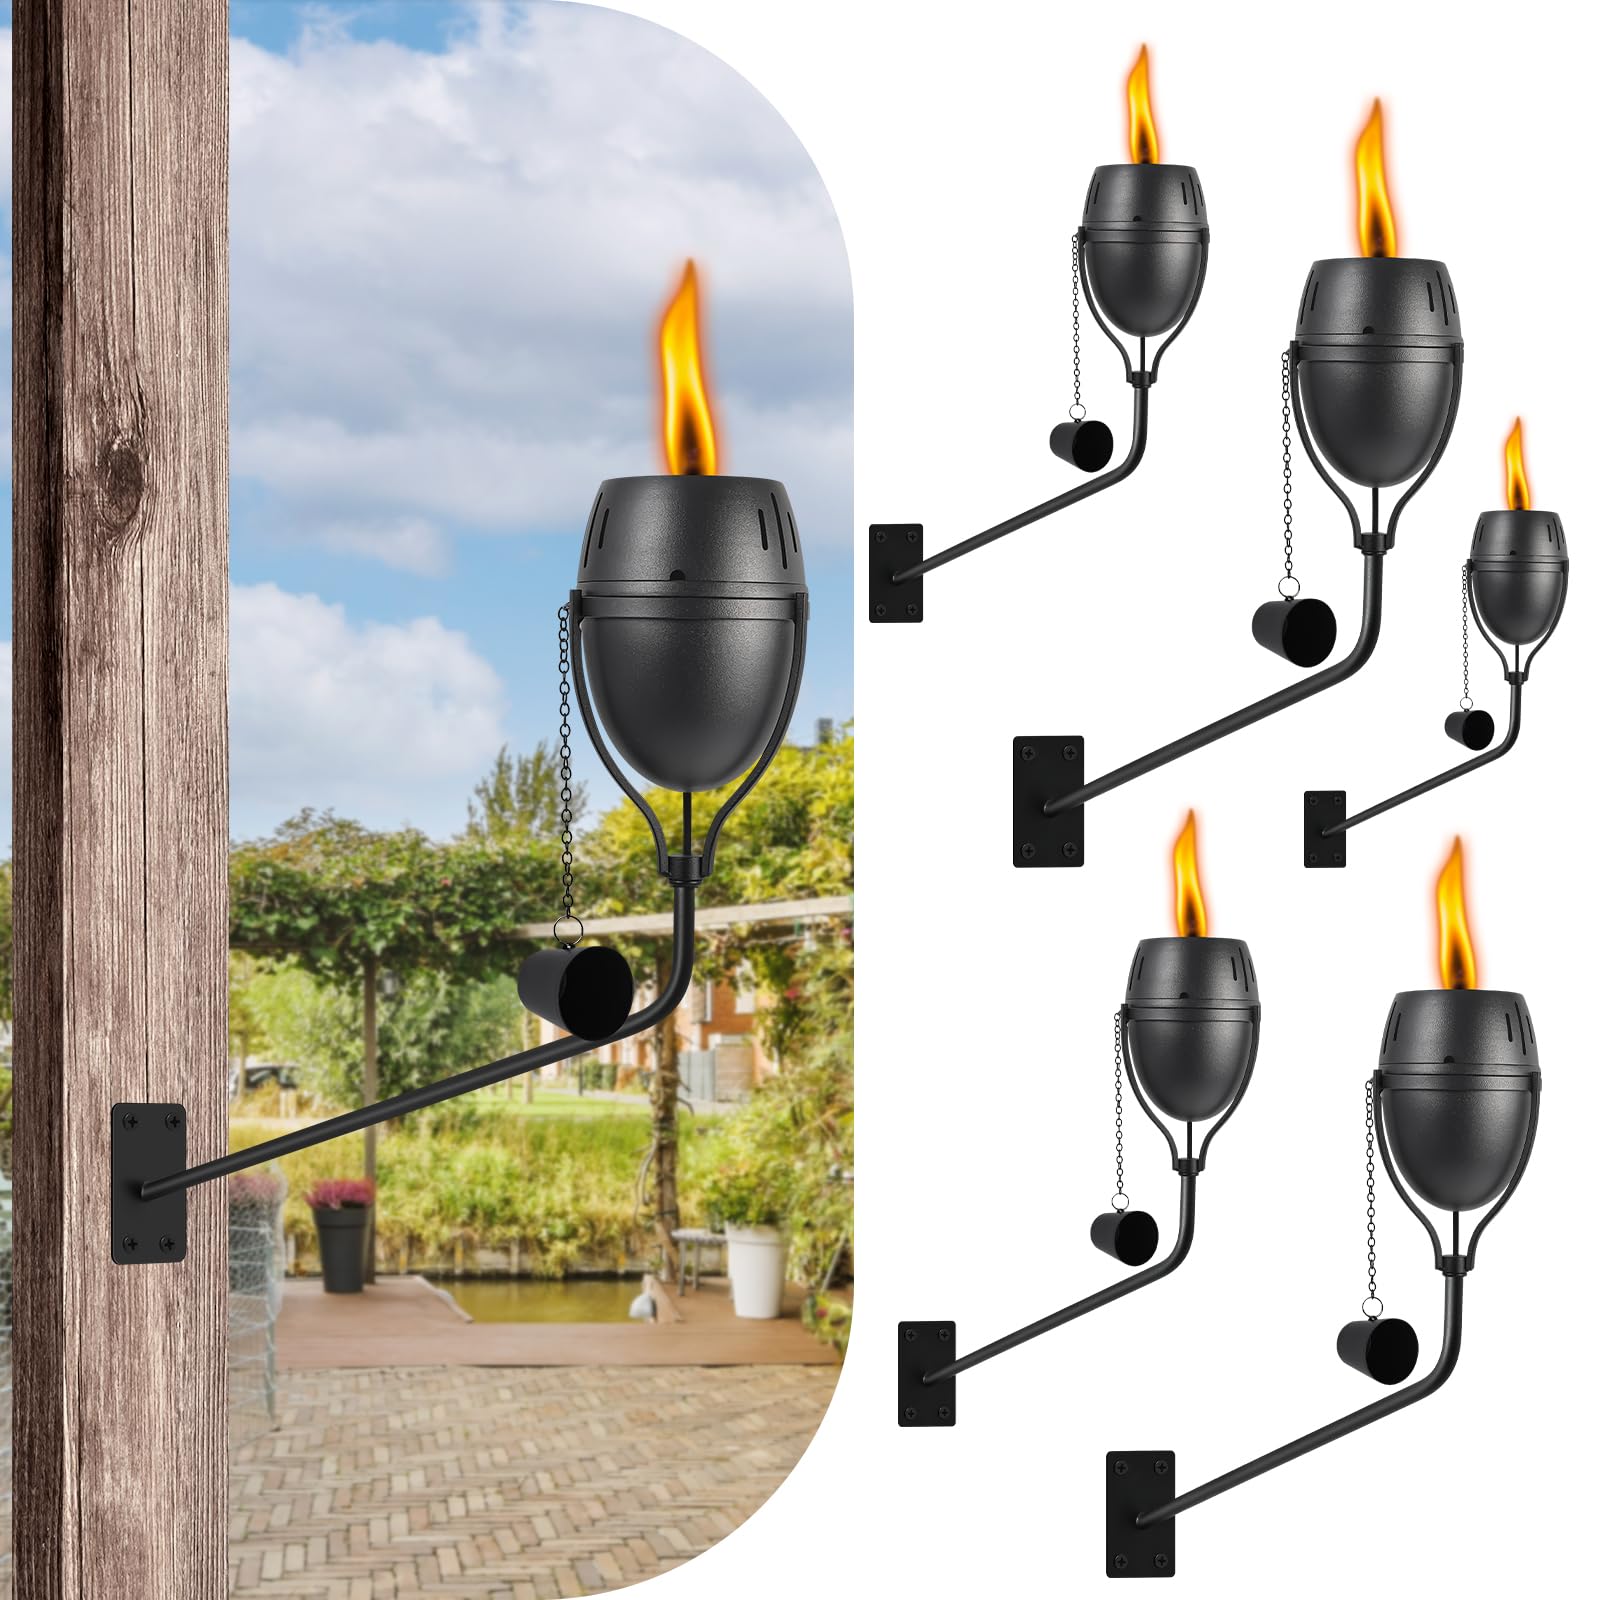
Pathway torches are designed to line walkways and driveways, providing subtle illumination for safety and ambiance. Fire bowls are larger, more substantial torches that serve as a focal point and offer a higher heat output. They’re ideal for creating a cozy gathering space. Wall-mounted torches are a space-saving option, perfect for smaller patios or balconies. They can be secured to fences, walls, or posts.
Materials matter when it comes to durability. Bamboo is a classic choice, but it's susceptible to weathering and rot. Metal torches, particularly those made from stainless steel, are more durable and resistant to rust. Glass torches offer an elegant look, but they're more fragile and require careful handling. I’m a bit hesitant about plastic torches; while they’re inexpensive, I question their long-term resistance to heat and UV exposure.
- Tiki Torches: Tropical aesthetic, affordable, best for backyards and patios.
- Pathway Torches: Subtle illumination, ideal for walkways and driveways.
- Fire Bowls: Focal point, high heat output, suitable for gathering spaces.
- Wall-Mounted Torches: Space-saving, perfect for smaller areas.
safe placement and clearance
Proper torch placement is absolutely essential for preventing accidents. A good rule of thumb is to maintain a minimum distance of 10 feet between any torch and flammable materials – that includes house siding, trees, shrubs, fences, furniture, curtains, and anything else that could potentially catch fire. This distance should be increased in windy conditions.
Wind is a significant factor. Even a gentle breeze can cause a torch flame to flicker and become unstable. Avoid placing torches in areas that are consistently exposed to strong winds. If you must place a torch in a windy spot, consider using a wind guard or shielding it with a larger object. Always ensure the torch is on a stable, level surface to prevent it from tipping over.
It’s crucial to be aware of local fire codes and restrictions. Some municipalities may have specific regulations regarding the use of open flames, particularly during dry seasons. Always check with your local fire department or homeowner's association before installing torches. I’ve seen firsthand the devastation caused by a carelessly placed torch – it’s a risk that’s simply not worth taking.
- Maintain a minimum of 10 feet clearance from flammable materials.
- Avoid placement in consistently windy areas.
- Ensure a stable, level surface.
- Check local fire codes and restrictions.
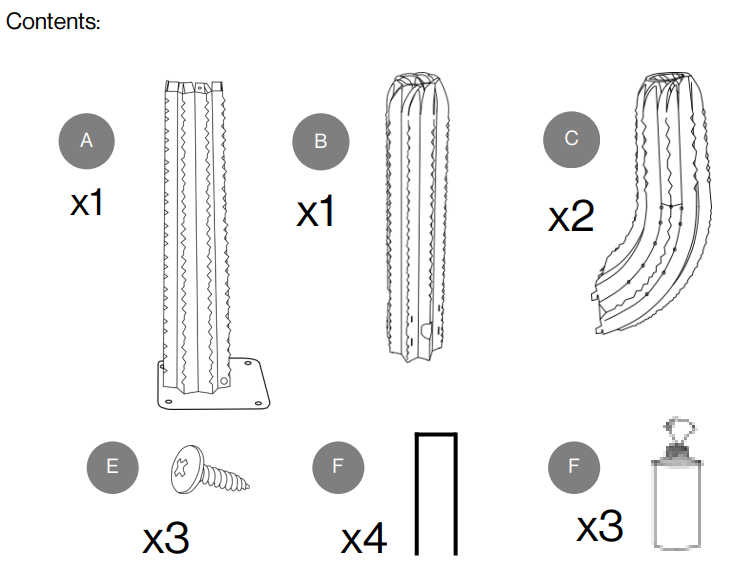
Step-by-Step Torch Assembly
Let’s walk through the assembly of a typical tiki torch. Most kits include a base, a pole, a torch head, and a wick. First, attach the torch head to the pole, usually by screwing it on tightly. Then, carefully fill the reservoir with your chosen fuel, leaving about an inch of space at the top to allow for expansion. Don't overfill it. Next, insert the wick into the opening in the torch head.
There are different types of wicks available – cotton, fiberglass, and bamboo. Cotton wicks are the most common and affordable, but they tend to burn faster. Fiberglass wicks are more durable and produce a more consistent flame. Bamboo wicks offer a natural look but may require more frequent trimming. Adjust the flame height by carefully pulling the wick up or pushing it down. The goal is to achieve a steady, controlled flame that isn’t too high or too low.
For freestanding torches, you can enhance stability by following the method demonstrated in this YouTube video: The World as Seen by Tom shows how to mount a torch using 2” PVC pipe, which provides a solid and secure base. This is a particularly useful technique if you have a windy yard or uneven ground. It's a surprisingly simple and effective solution.
- Attach the torch head to the pole.
- Fill the reservoir with fuel (leave 1 inch of space).
- Insert the wick.
- Adjust the flame height.
Maintaining Your Torch Investment
To ensure your torches last for years to come, regular cleaning and maintenance are essential. After each use, allow the torch to cool completely before cleaning it with a mild soap and water solution. Remove any soot or debris from the torch head and wick. Rinse thoroughly and allow to dry completely before storing.
During the off-season, store your torches in a dry, protected location. This will prevent rust and corrosion. Cover them with a tarp or store them in a shed or garage. Properly extinguish torches before storing them by depriving them of oxygen – a snuffer is the safest option. Dispose of leftover fuel responsibly, following local regulations.
I’ve found that regular cleaning significantly extends the life of a torch. A little bit of effort can prevent costly repairs or replacements down the road. Taking care of your torches will not only keep them looking their best but also ensure they continue to provide years of enjoyment.


No comments yet. Be the first to share your thoughts!