
Creating the Perfect Torch Ambiance: Beyond Just Light
Torchlight has an undeniable allure. It does more than just illuminate a patio; it creates a mood—a warm, inviting glow that feels instantly relaxing. Imagine summer evenings, good company, and the gentle flicker of flames. That’s the ambiance we aim for when adding torches to our outdoor spaces.
Torches extend the usability of an outdoor area. A well-lit patio becomes an extension of the home, allowing enjoyment long after sunset. Torches define the space, creating enclosure and intimacy. They also draw the eye, acting as a focal point and adding visual interest to a garden.
Beyond practicality, firelight has a primal appeal, tapping into something ancient and comforting. It's why we're drawn to campfires and fireplaces, and why strategically placed torches can transform a backyard into a magical retreat. The right lighting shifts the entire atmosphere of an outdoor area.
Citronella is the most popular fuel, largely for its insect-repelling properties. Paraffin and lamp oil are also common choices, each with distinct burn characteristics and scent profiles. Focus on the overall feeling you want to achieve. Experimentation helps find what works best for your space and preferences.
Torch Types Explained: Finding the Right Fit for Your Space
The world of outdoor torches is diverse. You're no longer limited to the classic tiki torch. Here are some popular options, considering the aesthetic they bring and where they shine. Understanding these differences helps narrow down choices and create the desired look.
Tiki torches are the iconic choice, instantly evoking a tropical or Polynesian vibe. Traditionally made from bamboo, they’re great for casual settings and larger spaces. They can be a bit whimsical and are perfect for luaus or backyard barbecues. However, bamboo can be prone to weathering, so consider that when choosing.
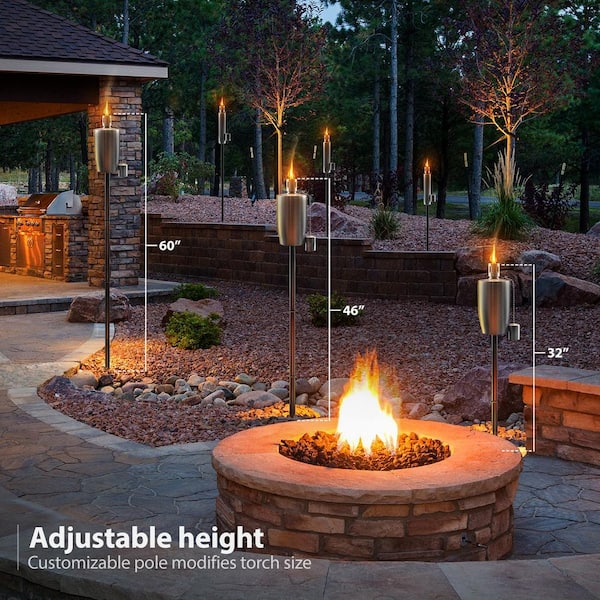
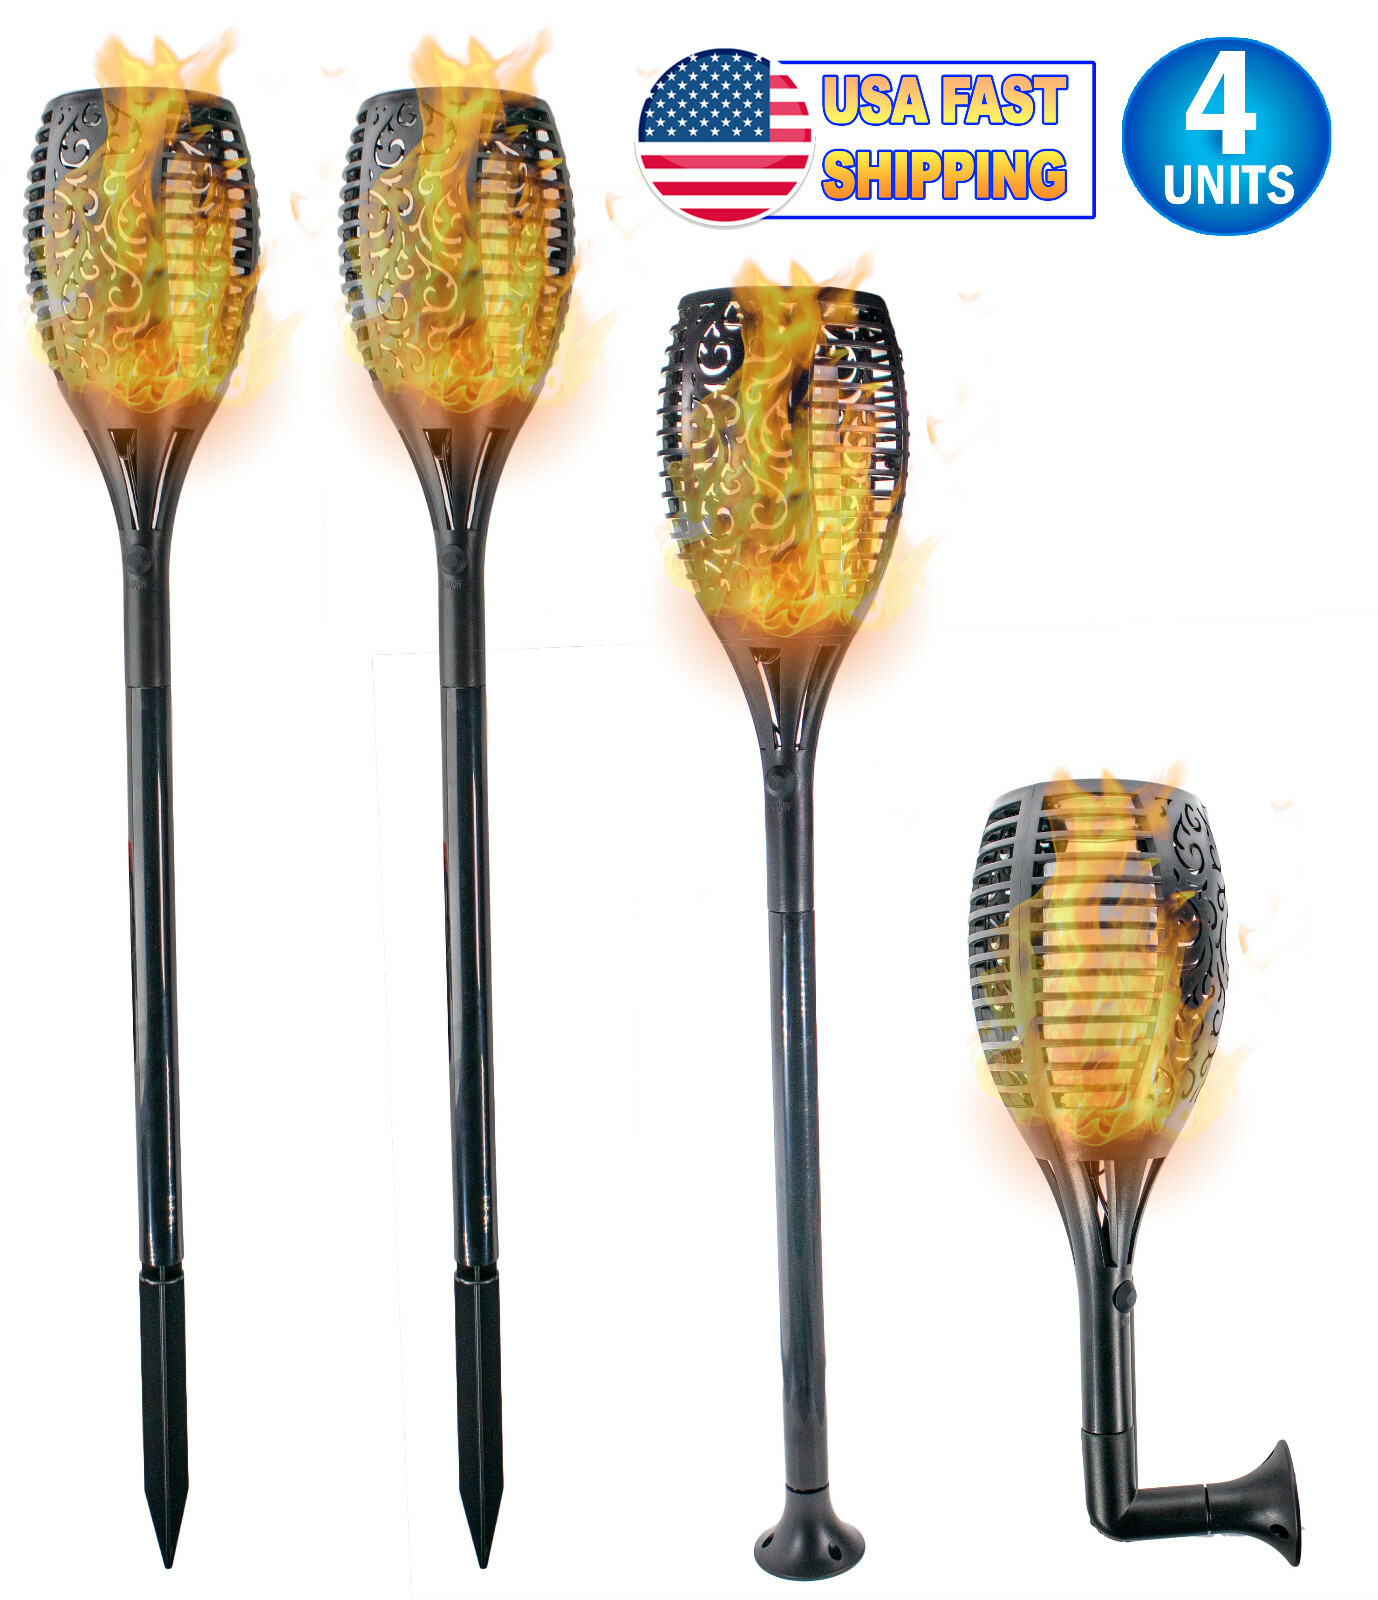
Freestanding torches, often made of metal, offer a more contemporary look. They tend to be more durable and versatile than bamboo torches. You can find them in a variety of styles, from sleek and minimalist to more ornate designs. These work well in almost any setting, from modern patios to rustic gardens.
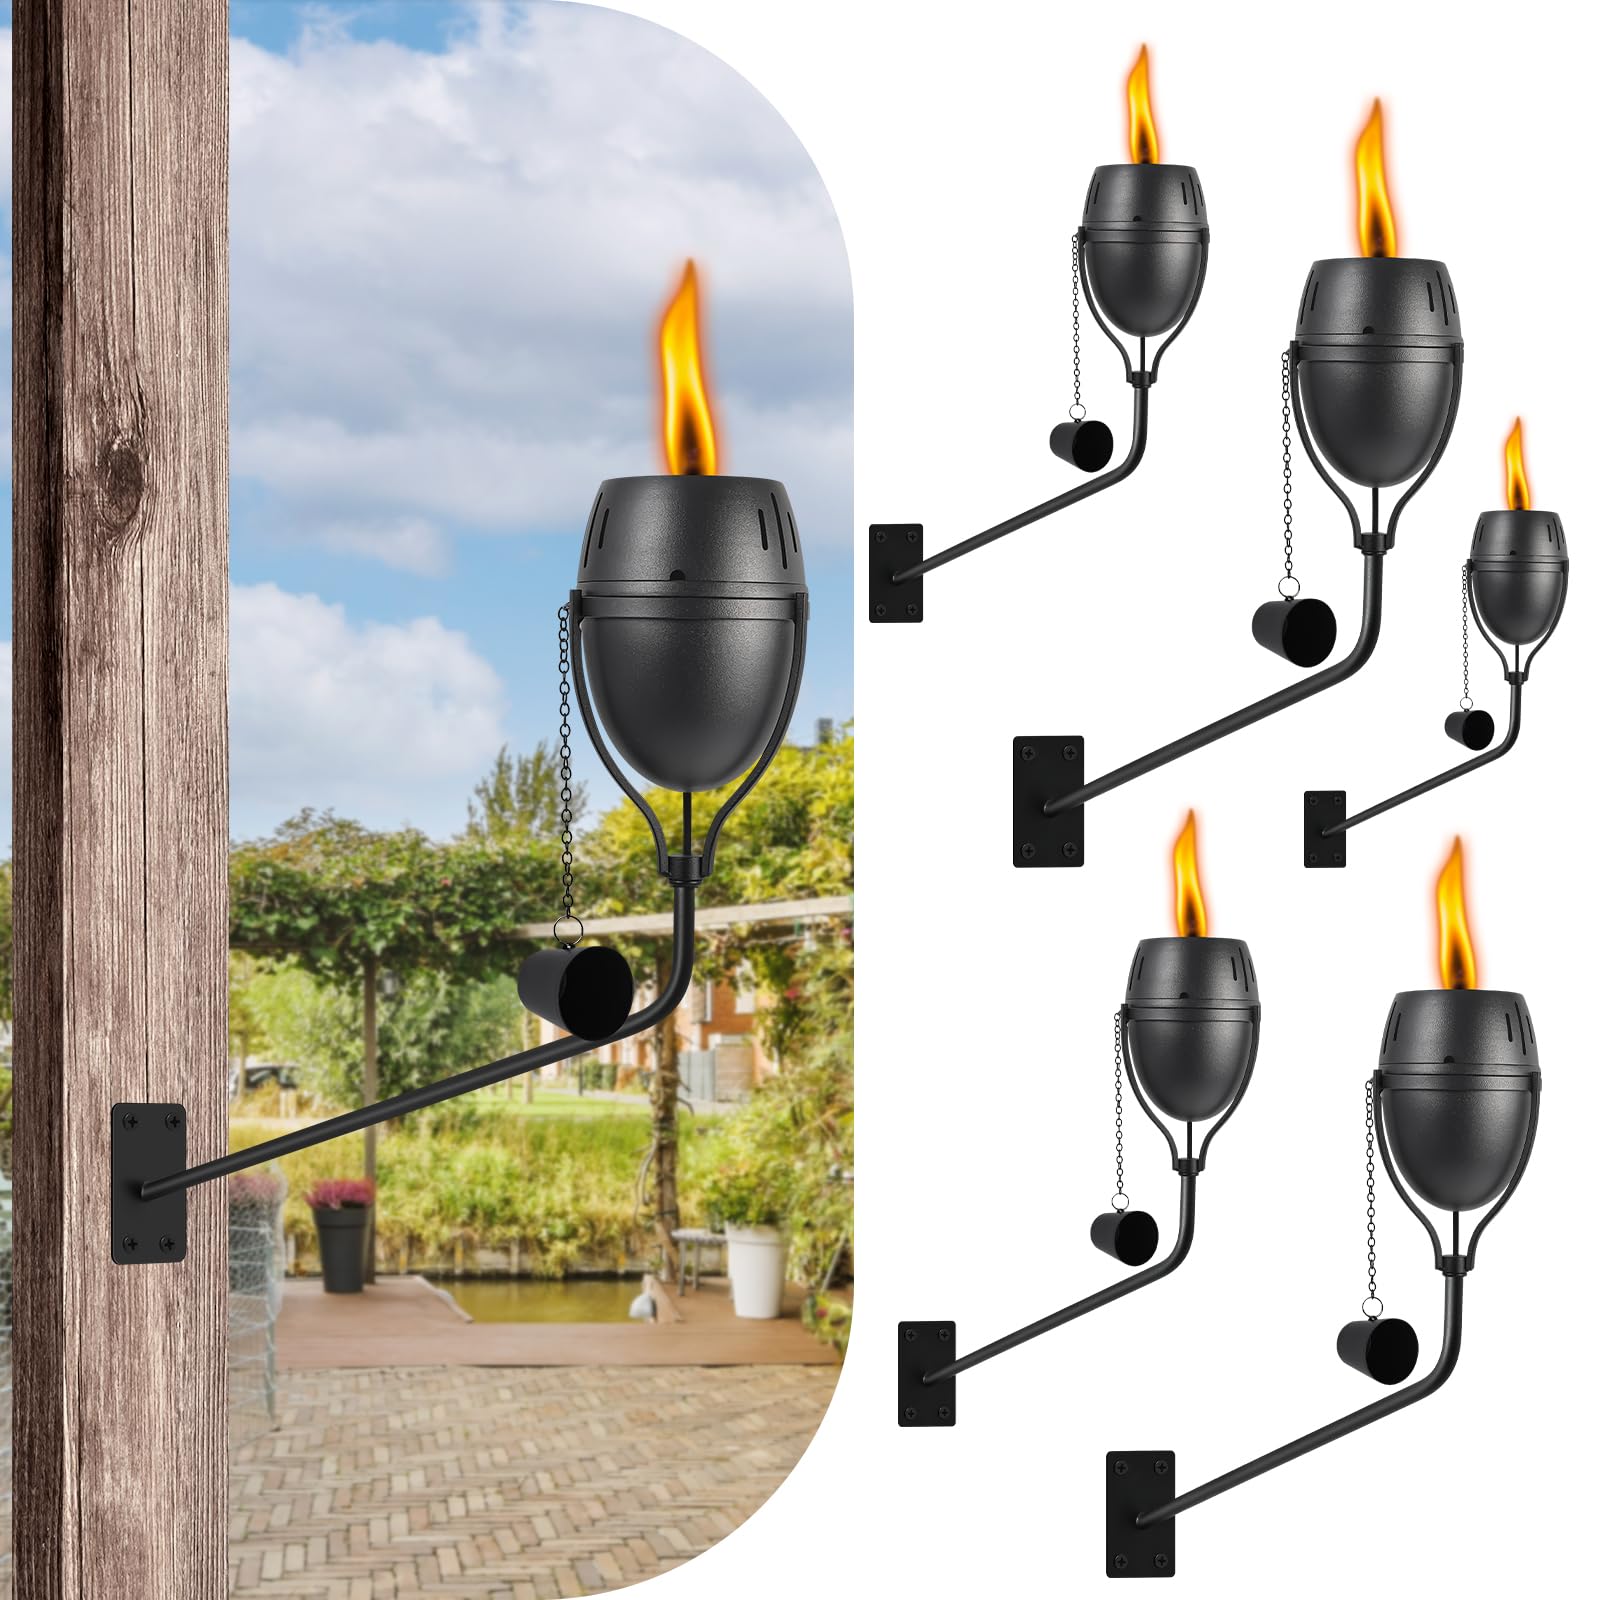
Wall-mounted torches are a great option for smaller spaces or areas where you want to maximize floor space. They can be attached to fences, walls, or even posts, creating a dramatic effect. The style will heavily influence the overall feel, so choose carefully. Metal is a common material, offering durability and a clean look.
Finally, fire bowls offer a completely different aesthetic. They’re more substantial and create a larger flame, making them ideal for creating a dramatic focal point. They can be used with wood, gel fuel, or propane, depending on the model. Fire bowls are best suited for larger patios or gardens where there’s ample space.
- Tiki Torches: Tropical, bamboo construction, casual vibe.
- Freestanding Torches: Versatile, durable, often metal construction.
- Wall-Mounted Torches: Space-saving, dramatic effect, various styles.
- Fire Bowls: Dramatic focal point, larger flame, wood/gel/propane fuel.
Torch Type Comparison
- Tiki Torches - Classic Polynesian style, offering a relaxed, tropical vibe. Often feature bamboo or wooden poles.
- Freestanding Torches - Versatile and portable, these torches come in various materials like metal or resin and can be placed anywhere with a stable surface. The Hampton Bay 58-in Black Steel Torch is a popular option.
- Wall-Mounted Torches - Ideal for maximizing space and creating a defined ambiance. These are often made of durable materials like wrought iron. Look at options from Home Decorators Collection.
- Fire Bowls - A more substantial and modern option, fire bowls create a dramatic focal point. Options like the Bali Outdoors Fire Pit Bowl offer a contemporary look.
- Aesthetic - Tiki: Rustic, tropical; Freestanding: Adaptable, modern to traditional; Wall-Mounted: Elegant, space-saving; Fire Bowl: Bold, contemporary.
- Best For - Tiki: Casual gatherings, luaus; Freestanding: Patios, decks, events; Wall-Mounted: Small spaces, defined areas; Fire Bowl: Focal points, larger spaces.
- Fuel Type - Most torches use citronella oil, paraffin oil, or liquid propane. Fire bowls may also use wood or gel fuel. Always check manufacturer recommendations.
- Typical Price Range - Tiki Torches: $15 - $50 each; Freestanding Torches: $30 - $150; Wall-Mounted Torches: $40 - $200; Fire Bowls: $100 - $500+ (depending on size and material).
- Maintenance - Regular refilling of fuel, wick trimming (for oil-based torches), and cleaning are essential. Fire bowls require ash removal and occasional cleaning of the burner.
Safety First: Fuel, Placement, and Fire Prevention
Working with open flame requires respect and caution. Safety is the most important part of any torch installation. Ignoring safety guidelines can lead to property damage, injury, or worse. This section covers essential precautions.
Fuel handling is crucial. Citronella oil is flammable. Store fuel in a cool, dry place, away from direct sunlight and heat sources. Never refill a torch while lit or hot. Always use a funnel to avoid spills, and wipe up any spills immediately. Paraffin and lamp oil require similar care.
Placement is critical. Keep torches at least six feet away from structures like houses, fences, and sheds. Avoid placing them near flammable materials such as dry leaves, overhanging branches, or curtains. A stable base is essential; a wobbly torch is a fire hazard. Soft ground can cause a torch to tip over.
Wind is a major factor. Never leave a lit torch unattended, especially on windy days. A gentle breeze can cause the flame to flicker and spread embers. If the wind picks up, extinguish torches immediately. Some torches have snuffer caps, making extinguishing the flame easier and safer.
Underestimating the heat generated by torches is a common mistake. Keep them away from anything that could melt or catch fire. Be mindful of children and pets. Supervise them closely when torches are lit and ensure they understand fire's dangers.
- Store fuel safely, away from heat and sunlight.
- Never refill a lit or hot torch.
- Maintain a six-foot distance from structures.
- Ensure a stable base on a level surface.
- Be mindful of wind conditions and extinguish torches if necessary.
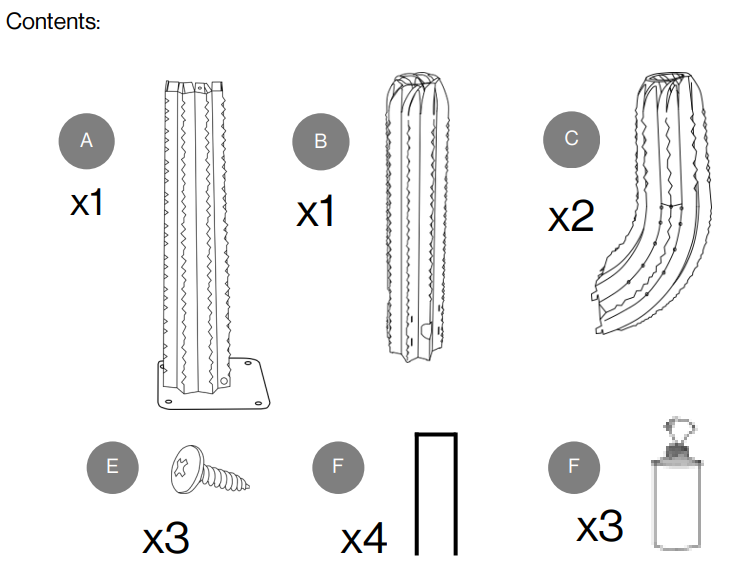
DIY Torch Installation: A Step-by-Step Guide (with Video)
This guide focuses on installing a freestanding torch, the most common DIY project. The YouTube video from The World as Seen by Tom (https://www.youtube.com/watch?v=6M-V-Rj3b6I) offers a visual guide to using 2” PVC pipe for added stability, which is incorporated here.
Step 1: Gather your materials. You’ll need the torch itself, citronella fuel, a funnel, a sturdy PVC pipe (2” diameter is recommended), and potentially some gravel or sand to further stabilize the base. A small shovel or trowel can also be helpful.
Step 2: Prepare the base. If your torch base isn't particularly stable, insert the PVC pipe into the ground, leaving enough length above ground to accommodate the torch base. The video shows how to do this effectively. This provides a solid foundation and prevents the torch from tipping over. Backfill around the PVC pipe with gravel or sand for added support.
Step 3: Insert the torch. Carefully slide the torch base over the PVC pipe. Ensure it fits snugly and is securely positioned. If it’s loose, add more gravel or sand around the base.
Step 4: Fill the torch with fuel. Using a funnel, carefully pour the citronella fuel into the torch reservoir. Do not overfill. Leave some space at the top to prevent spills. Remember, never fill a lit torch.
Step 5: Light the torch. Use a long-handled lighter or match to ignite the wick. Be careful to avoid getting your hand too close to the flame. Allow the flame to stabilize before leaving the torch unattended.
For wall-mounted torches: Ensure the mounting surface is strong enough to support the torch’s weight. Use appropriate screws and anchors for the wall material. Follow the manufacturer’s instructions for mounting. Double-check the security of the mounting bracket before lighting the torch.
Spacing and Arrangement: Designing Your Torch Layout
Now comes the fun part: arranging your torches to create the desired ambiance. There’s no hard and fast rule, but some guidelines can help you achieve a balanced and inviting look. Consider the size and shape of your patio or garden.
For a small patio (less than 10x10 feet), two to four torches strategically placed around the perimeter are usually sufficient. Focus on creating a warm glow rather than overpowering the space. Place them near seating areas to provide ample light for conversation.
For a larger patio or garden, you can use more torches and experiment with different layouts. A good starting point is to space torches eight to ten feet apart. Consider creating pathways with torches to guide guests through the space. Use them to highlight focal points, such as a water feature or a beautiful plant.
Think about layering the light. Combine torches of different heights and styles to create visual interest. You can also use torches in conjunction with other outdoor lighting, such as string lights or lanterns. The goal is to create a warm, inviting atmosphere that complements your existing décor.
Don't be afraid to experiment! Try different arrangements until you find what works best for your space. Remember, the key is to create a relaxing and enjoyable outdoor environment. A little planning can go a long way in transforming your patio into a magical retreat.
Troubleshooting Common Torch Problems
Even with careful setup, you might encounter a few issues. Flickering flames, torches that won’t stay lit, or fuel leaks are all relatively common. Fortunately, most problems have simple solutions.
Flickering flames: This is often caused by a draft or low fuel level. Shield the torch from the wind, or add more fuel. Also, ensure the wick is properly trimmed to about ¼ inch. A frayed or overgrown wick can cause uneven burning.
Torch won’t stay lit: This could be due to a wet wick or a faulty lighter. Try drying the wick thoroughly, or replace the wick if it’s damaged. Ensure you’re using a reliable lighter or match.
Fuel leaks: Check the torch reservoir for cracks or damage. If you find any, discontinue use immediately. Ensure the fuel cap is tightly sealed. If the leak persists, it’s time to replace the torch.
Preventative maintenance: Regularly clean your torches to remove dirt and debris. This will help ensure they burn properly and last longer. Store torches indoors during the off-season to protect them from the elements.
- Problem: Flickering flame. Solution: Shield from wind, add fuel, trim wick.
- Problem: Torch won't stay lit. Solution: Dry wick, replace wick, use reliable lighter.
- Problem: Fuel leak. Solution: Check for cracks, seal cap, replace torch.
Beyond Citronella: Exploring Alternative Torch Fuels
While citronella is the go-to for many, it’s not the only option. Several alternative torch fuels offer different benefits and drawbacks. Exploring these options can help you tailor your outdoor lighting to your specific needs.
Paraffin oil is a common alternative, known for its clean burn and relatively low cost. However, it doesn’t offer the insect-repelling properties of citronella. It also tends to produce a brighter, more intense flame.
Lamp oil is another option, often offering a longer burn time than citronella. However, it can have a noticeable odor, which may not be desirable for everyone. Some lamp oils are also less effective at repelling insects.
Bioethanol is a more eco-friendly option, derived from plant sources. It burns cleanly and produces minimal smoke. However, it’s generally more expensive than other fuels and may require a special torch designed for bioethanol use.
Ultimately, the best fuel depends on your priorities. If insect repellent is essential, citronella is the clear choice. If you’re looking for a longer burn time or a cleaner flame, paraffin or bioethanol might be better options.
- Citronella: Insect repellent, common, moderate burn time.
- Paraffin Oil: Clean burn, low cost, no insect repellent.
- Lamp Oil: Longer burn time, potential odor.
- Bioethanol: Eco-friendly, clean burn, more expensive.
Torch Fuel Comparison
| Fuel Type | Burn Time | Scent | Environmental Impact | Safety |
|---|---|---|---|---|
| Citronella | Moderate (typically 4-6 hours per fill) | Strong, citrusy – intended to repel insects | Generally considered low impact, as it's a natural oil. Biodegradable. | Relatively safe, but can still cause burns. Keep away from flammable materials. |
| Paraffin | Long (6-8 hours per fill) | Odorless, or very slight oil smell | Derived from petroleum, so has a higher environmental impact. Not biodegradable. | Can produce soot and potentially harmful fumes. Requires careful handling. |
| Lamp Oil | Variable (3-6 hours, depending on formulation) | Often odorless, but scented options are available | Typically a highly refined petroleum product. Environmental impact is moderate to high. | Similar safety concerns to paraffin – potential for soot and fumes. Flammable. |
| Bioethanol | Moderate (2-4 hours per fill) | Odorless when burning cleanly, some formulations have added scents | Renewable source (made from fermented plant starches), making it a more sustainable option. Burns cleanly. | Lower risk of soot and fumes than petroleum-based fuels. Still flammable and requires caution. |
| Kerosene | Long (8-12 hours per fill) | Distinct, oily odor | High environmental impact, derived from petroleum. Not biodegradable. | Presents significant safety concerns due to fumes, flammability, and potential for residue. |
| Vegetable Oil | Shorter (2-3 hours per fill) | Generally odorless, may have a slight cooking oil smell | Biodegradable and renewable, making it a very environmentally friendly option. | Lower flammability risk than other fuels, but can still burn. May produce smoke. |
Illustrative comparison based on the article research brief. Verify current pricing, limits, and product details in the official docs before relying on it.

No comments yet. Be the first to share your thoughts!