
Setting the Scene: Torch Styles
Outdoor torches transform patios and gardens, offering a warmth electric lighting can't match. Beyond the classic tiki style, many varieties suit different spaces and aesthetics.
Tiki torches, with bamboo or wooden poles, evoke a Polynesian vibe. Freestanding torches offer stability and portability, while wall-mounted options provide a permanent solution. Fire bowls create a dramatic focal point. Choose the style that fits your aesthetic.
Fuel options include citronella oil (insect-repelling, strong scent), paraffin oil (cost-effective, clean burn), and propane (consistent flames, for larger features). Consider burn time, scent, and aesthetic when choosing.

Safety First: Location, Location, Location
Safety is paramount when installing torches. Improper placement creates fire hazards and risks injury. Maintain at least ten feet of clearance from structures like your house, shed, or fence.
Keep torches clear of overhanging branches and flammable materials like dry leaves or mulch. Place them away from foot traffic to prevent them from being knocked over.
Position torches to minimize smoke drift, considering prevailing winds. Check local ordinances and HOA rules regarding open flames to avoid fines or removal. Prioritize safety and compliance.
- Maintain at least 10 feet of clearance from structures.
- Keep torches away from overhanging branches and flammable materials.
- Ensure torches are out of high-traffic areas.
- Position torches to minimize smoke drift based on wind direction.
- Check local ordinances and HOA rules.
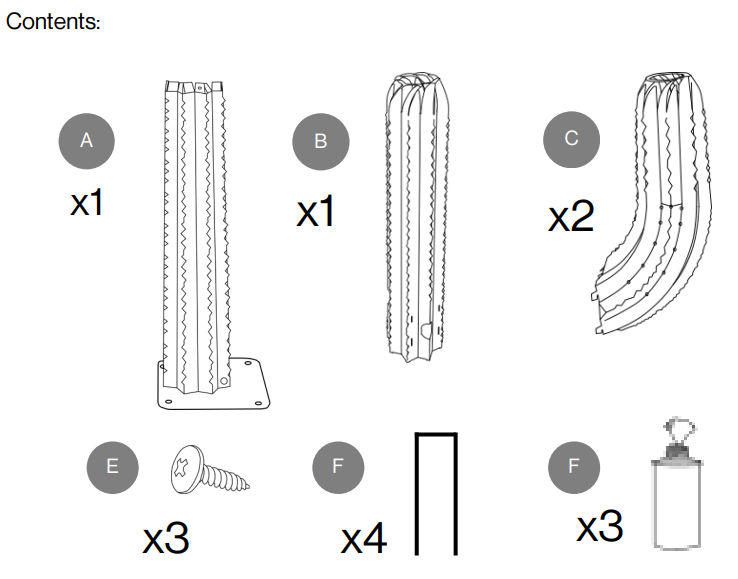
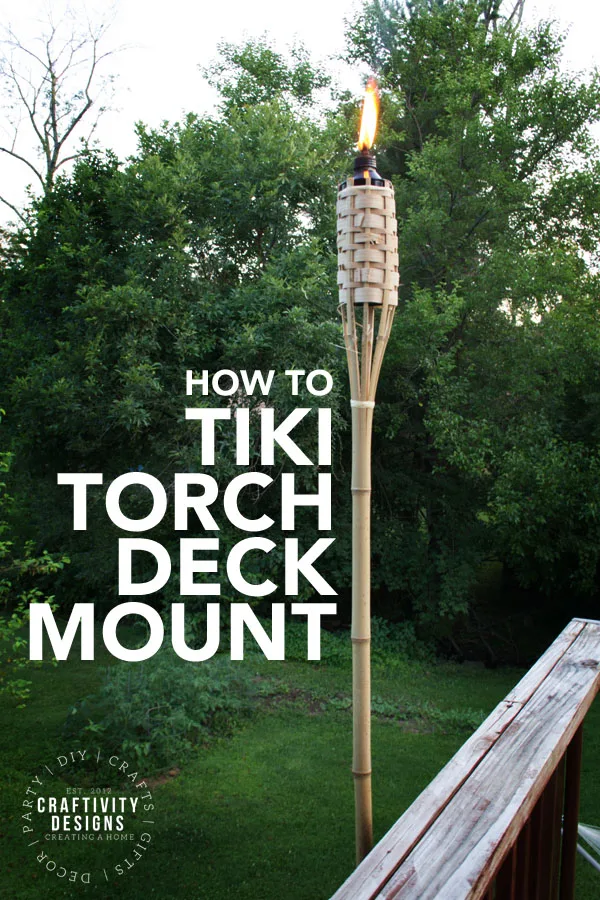
Freestanding Torch Installation: A Ground-Up Approach
To install a freestanding torch, select a safe location and ensure the ground is level for stability. Add sand or gravel if needed for a firm base.
For added support, especially on soft or uneven ground, consider using 2” PVC pipe as suggested by The World as Seen by Tom. Insert the torch pole securely, using a gentle twisting motion if needed.
Pour fuel into the reservoir, avoiding overfilling. Insert the wick and trim it to about ¼ inch for a clean, consistent flame that minimizes smoke and flickering.
- Choose a safe and level location.
- Level the ground if necessary.
- Consider using 2” PVC pipe for added support.
- Insert the torch pole securely.
- Fill with fuel, avoiding overfilling.
- Trim the wick to ¼ inch.
Wall-Mounted Torch Setup: Secure and Stable
Securing wall-mounted torches requires finding wall studs with a stud finder for the strongest support. Screwing directly into a stud is most reliable.
If studs aren't available, use appropriate wall anchors suited for your wall material (wood, brick, stucco, concrete). Follow manufacturer instructions to ensure stability.
Choose a mounting bracket that can safely support the torch's weight, considering your wall type. Verify the weight capacity of the bracket and any wall anchors.
Fueling Your Flames: Types and Best Practices
Citronella oil repels insects but has a strong scent. Paraffin oil is a neutral, less expensive option suitable for larger displays.
Propane torches provide a consistent flame but require careful handling and storage of the tank. Use a funnel when filling any torch to prevent spills and overfilling, and ensure you use the correct fuel type for your model.
Store fuel containers in a cool, dry, well-ventilated area away from heat and ignition sources. Never store fuel indoors and dispose of used fuel according to local regulations.
- Citronella Oil: Insect repellent, distinct scent.
- Paraffin Oil: Cost-effective, neutral scent.
- Propane: Consistent flame, requires careful handling.
Torch Fuel Comparison
| Fuel Type | Burn Time | Scent Profile | Relative Cost | Safety Considerations |
|---|---|---|---|---|
| Citronella | Shorter | Strong, Insect Repellent | Generally Lower | Requires careful handling; potential irritant |
| Paraffin | Medium | Mild, Often Refined | Moderate | Moderate flammability; produces soot |
| Propane | Longest | Typically None | Higher Initial Cost, Moderate Refills | Higher BTU output; requires secure tank connection and ventilation |
| Lamp Oil (Mineral Oil) | Medium | None | Moderate | Relatively stable, but still flammable; avoid spills |
| Biofuel (Ethanol-based) | Medium to Short | Generally None, can accept fragrance oils | Moderate to Higher | Lower smoke, but flammable; requires proper ventilation |
| Kerosene | Long | Distinct, Pungent | Lower | High flammability; strong odor; potential health concerns |
Qualitative comparison based on the article research brief. Confirm current product details in the official docs before making implementation choices.
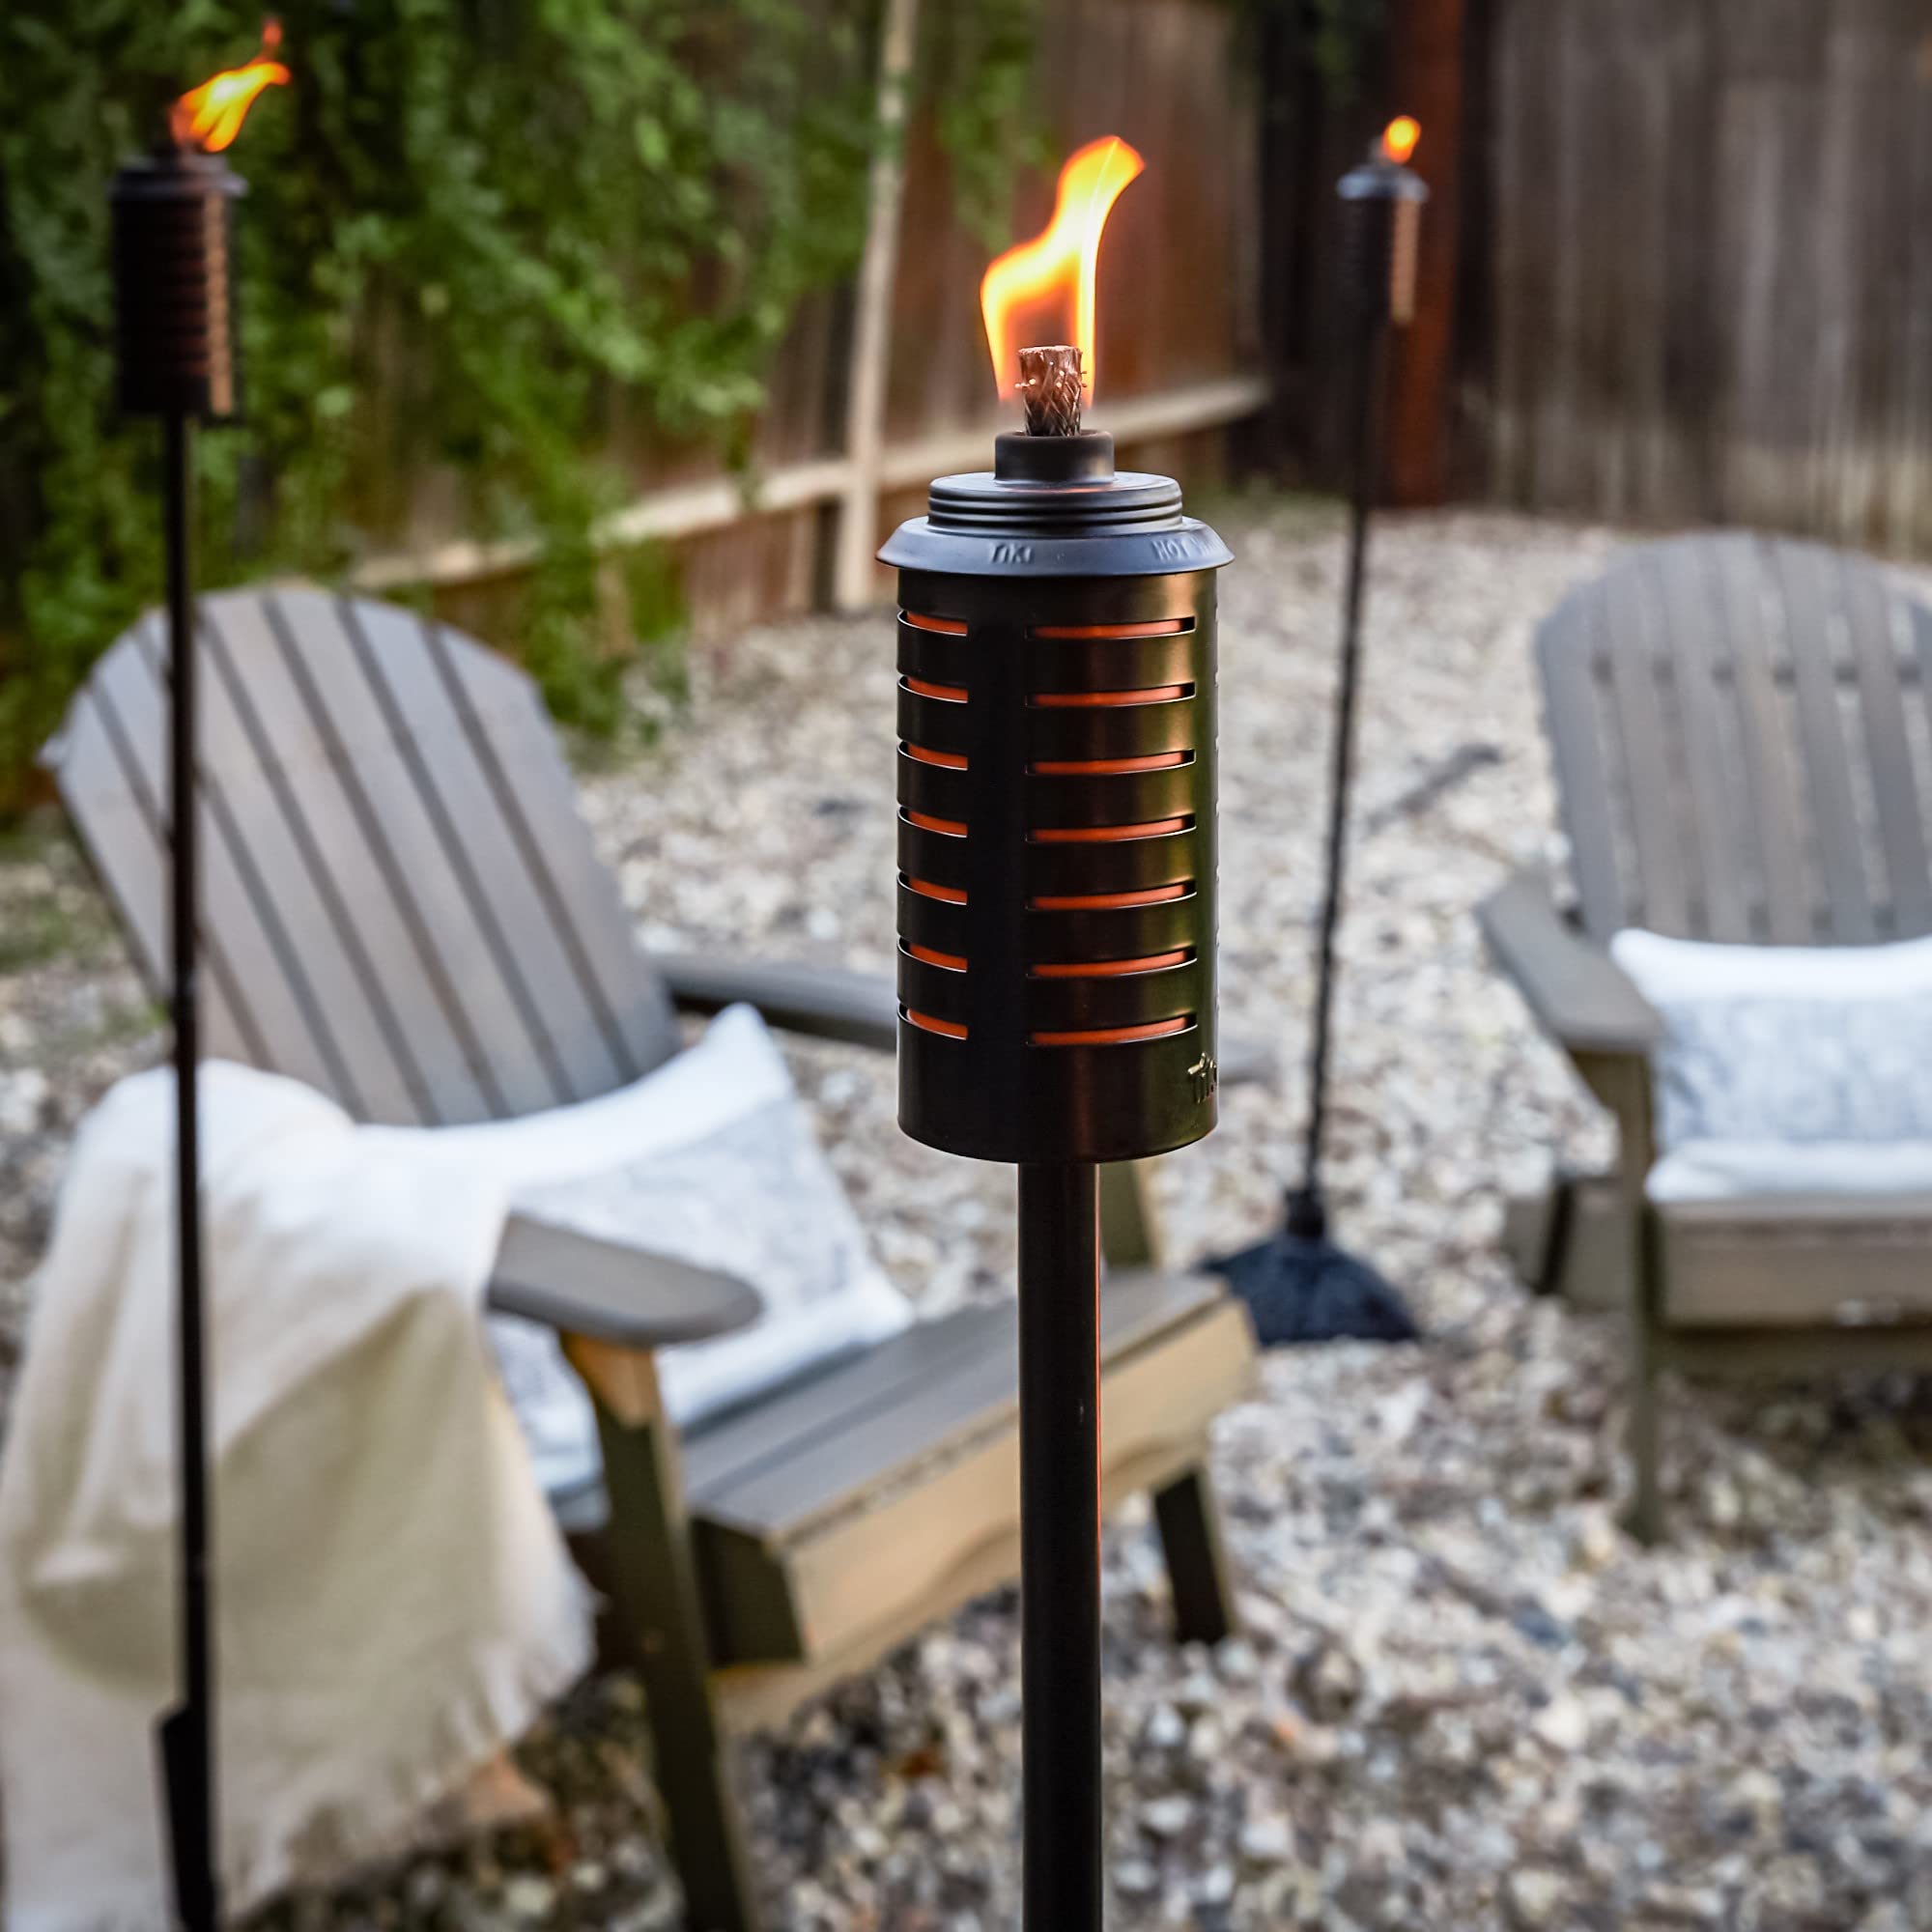
Arranging for Ambiance: Torch Placement Ideas
Define seating areas with torches to create intimacy and warmth. Place them around the perimeter to delineate the space and provide ambient lighting. Highlighting pathways with torches enhances safety and adds elegance.
Use torches to create a focal point, like a fire bowl centerpiece, or group them for a dramatic effect in larger areas. Complement your outdoor space's landscaping and architecture with torch placement.
Subtlety is key; aim for a warm glow, not stadium lighting. Varying torch height and arrangement adds visual interest and enhances the aesthetic.
Maintenance Matters: Keeping Torches Burning Bright
Regular maintenance ensures torches burn brightly and safely. Trim wicks for a clean, consistent flame and minimal smoke. Clean the torch bowl to remove soot and debris, maintaining performance and preventing clogs.
Check for leaks when refilling fuel and ensure the reservoir is sealed. Store torches in a dry, protected location during the off-season to prevent rust. Never use water to extinguish flames; use a snuffer or deprive the flame of oxygen.
If a torch won't stay lit, the wick may be clogged. Try cleaning it with a brush or replacing it.
Troubleshooting Common Torch Problems
Even with careful maintenance, you may encounter occasional problems with your torches. If your torch won’t stay lit, first check the wick. It may be too short, too long, or clogged. A flickering flame can be caused by a draft or low fuel level. Try shielding the torch from the wind or refilling the reservoir.
Excessive smoke usually indicates an improperly trimmed wick or contaminated fuel. Trim the wick and consider using a different fuel source. Fuel leaks are a serious issue. Immediately extinguish the flame and inspect the torch for damage. Do not use the torch until the leak is repaired.
Always consult the manufacturer’s instructions for specific troubleshooting guidance. If you’re unable to resolve the problem yourself, or if you’re concerned about safety, don’t hesitate to consult a professional. Prioritizing safety is always the best course of action.
- Torch won’t stay lit: Check wick length and cleanliness.
- Flickering flame: Shield from wind, refill fuel.
- Excessive smoke: Trim wick, use clean fuel.
- Fuel leaks: Extinguish flame, inspect for damage.

No comments yet. Be the first to share your thoughts!