
Choosing a torch style
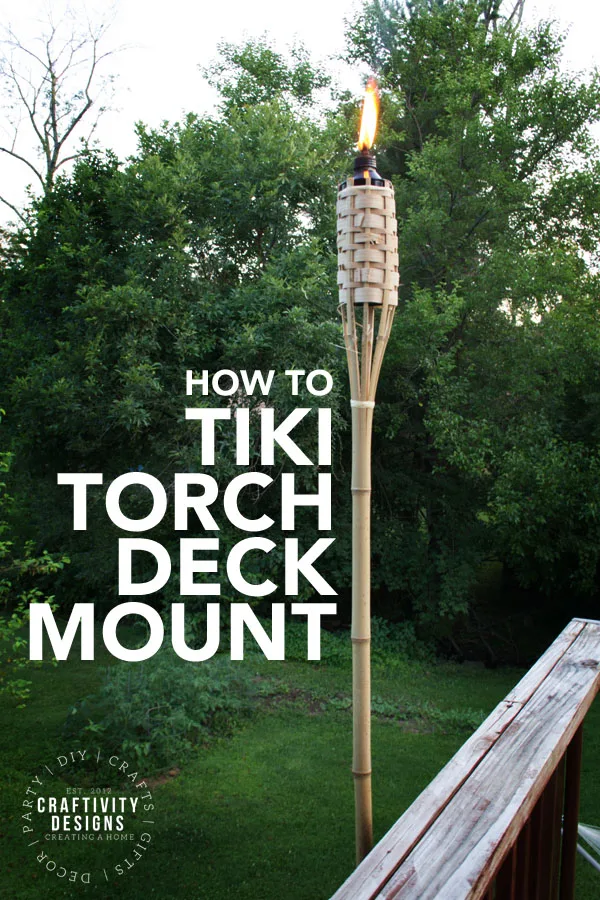
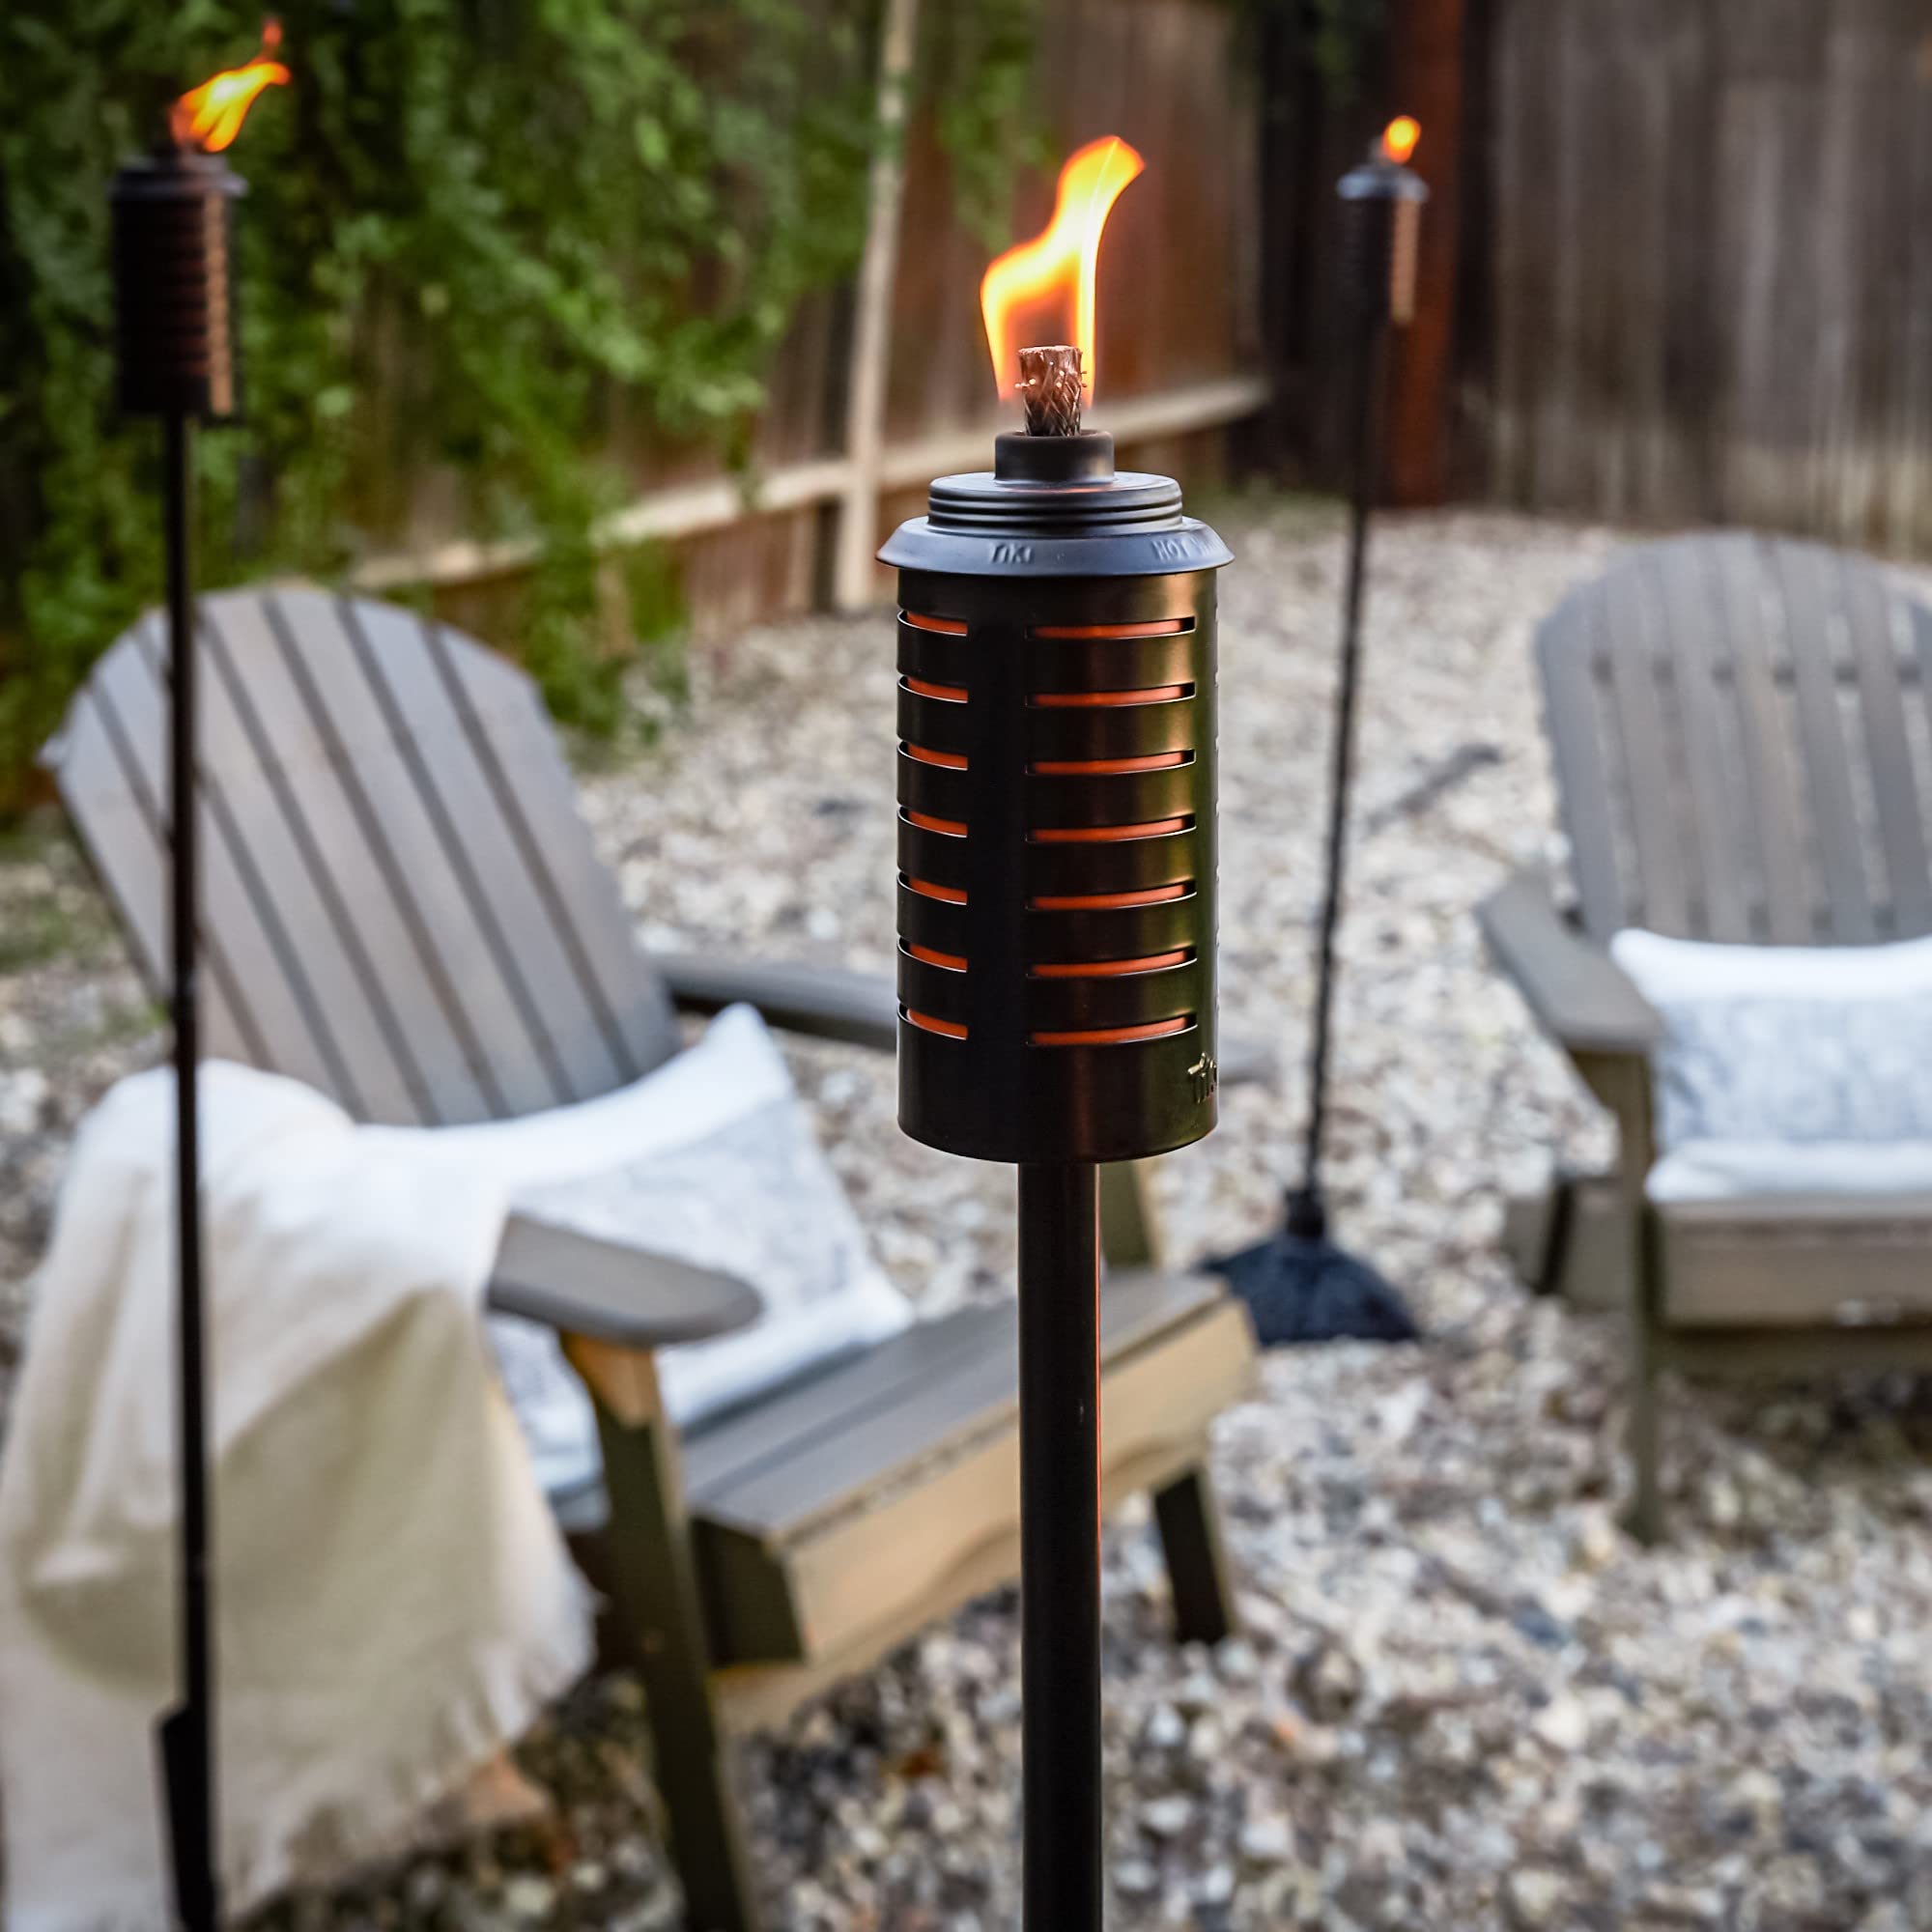
Most people picture a bamboo tiki torch first, but the options have expanded. You can now find steel pathway stakes, wall-mounted sconces, and heavy fire bowls. I've seen a shift from using these just for one-off parties to permanent backyard setups that stay out all summer. The goal is usually a steady glow rather than a loud luau theme.
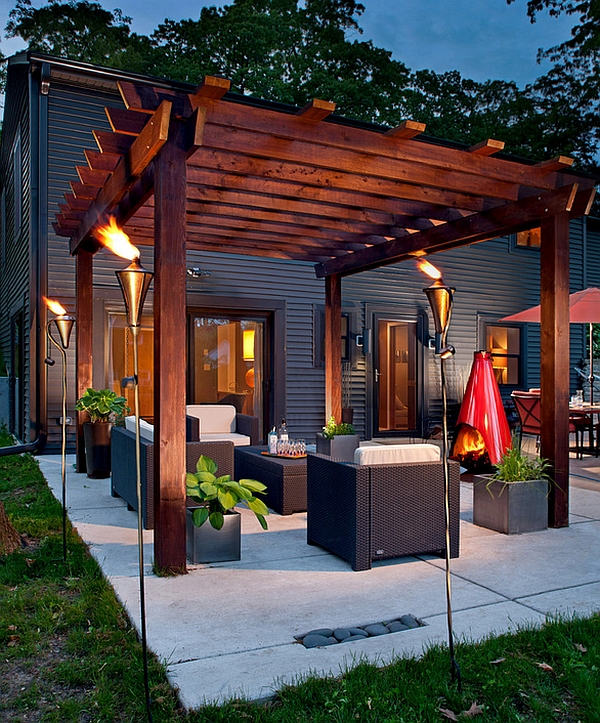
The aesthetic you choose really depends on your overall outdoor style. A modern patio might call for a minimalist metal pathway torch, while a more rustic setting could benefit from the natural look of bamboo. Fire bowls make a statement, acting as a central gathering point, but require more space. Don’t underestimate the power of a well-placed wall-mounted torch to add a touch of romance or a soft glow to an evening gathering.
Fuel is another important consideration. Citronella is the go-to for mosquito control, but it has a distinct scent that not everyone loves. Paraffin is a cleaner-burning option, and gel fuels offer convenience and a longer burn time. Propane torches are also available, offering a powerful flame, but require a propane tank and regulator. Each fuel type has its pros and cons regarding cost, burn time, and environmental impact. Right now, paraffin and gel fuels seem to be gaining popularity due to their cleaner burn and ease of use.
How to install them yourself
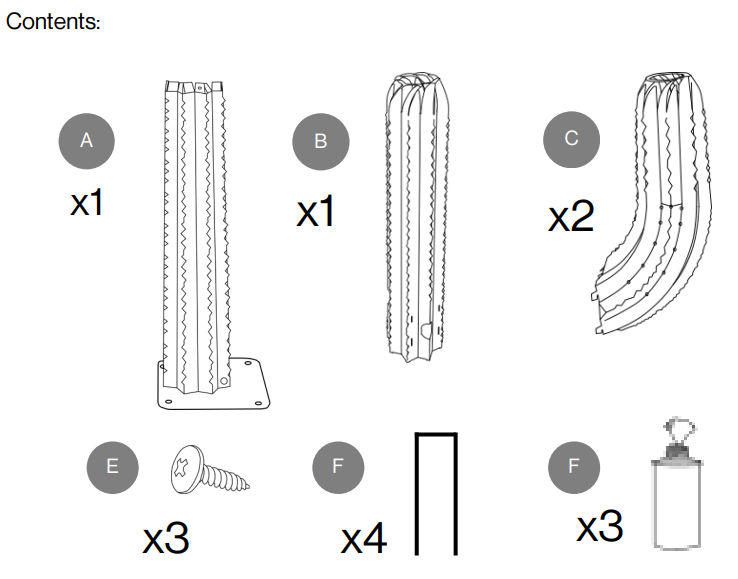
Staking a torch into the ground is the easiest way to start. I recommend burying the stake at least six inches deep. If your soil is loose or sandy, drive a 2-inch PVC pipe into the ground first, then drop the torch pole inside. It keeps the torch upright when the ground gets muddy after rain.
Mounting wall torches requires a bit more precision. You’ll need to locate wall studs to ensure a secure attachment. Use appropriate screws and anchors for your wall material – wood, brick, or concrete will each require different hardware. Always follow the manufacturer's instructions for specific mounting guidelines. Remember to measure and mark the desired height carefully before drilling any holes.
Fire bowls typically sit directly on a patio surface, but it’s important to ensure the surface is heat-resistant. Avoid placing them on wood decks or near flammable materials. For all torch types, proper fuel handling is essential. Always fill the torch outdoors, away from any open flames, and avoid overfilling. If you spill any fuel, clean it up immediately. Adapt your approach depending on your patio surface—concrete is more forgiving than a wooden deck, for example.
- Pick a spot away from low-hanging branches or dry brush.
- Step 2: For freestanding torches, securely stake them into the ground.
- Step 3: For wall torches, locate studs and mount securely with appropriate hardware.
- Step 4: Carefully fill the torch with fuel, following manufacturer’s instructions.
- Step 5: Light the torch and enjoy!
Safety and fire prevention
Safety should be your top priority when installing and using patio torches. Fire is, obviously, the biggest concern. Always keep torches away from flammable materials like dry grass, leaves, curtains, and overhanging branches. Ensure there’s a clear space around each torch to prevent accidental ignition. Regularly check for any signs of fuel leaks and address them immediately.
Tip-overs are another common hazard. As mentioned earlier, securing torches properly is crucial. Wind conditions can also play a significant role. A sudden gust of wind can easily topple a torch or spread a flame. Be mindful of the wind direction and consider relocating torches or extinguishing them if conditions become too windy. Never leave burning torches unattended, and always extinguish them before leaving the patio or going to bed.
Keep torches out of reach of children and pets. The flames and hot surfaces can cause serious burns. In case of an accident, have a fire extinguisher or a bucket of water readily available. Familiarize yourself with local fire codes and regulations regarding outdoor fires. These regulations can vary depending on your location, so it's important to be informed.
- Drive stakes deep enough that they don't wobble when nudged.
- Clearance: Keep a safe distance from flammable materials.
- Wind awareness: Monitor wind conditions and adjust accordingly.
- Supervision: Never leave burning torches unattended.
- Emergency preparedness: Have a fire extinguisher nearby.
Professional Installation: When to Call an Expert
While many torch installations are straightforward DIY projects, there are situations where hiring a professional is the best course of action. Complex gas line installations, for example, should always be handled by a qualified professional. Improperly installed gas lines can be extremely dangerous. Similarly, large-scale setups involving multiple torches or intricate lighting designs may benefit from expert planning and execution.
If you’re uncomfortable with any part of the installation process, don’t hesitate to call a professional. It’s better to be safe than sorry. A qualified installer will ensure that everything is done correctly and in compliance with local codes. Look for installers with experience in outdoor lighting and gas line installation. Ask for references and check online reviews.
The cost of professional installation can vary depending on the scope of the project and your location. Expect to pay more for complex installations involving gas lines or electrical work. It’s always a good idea to get quotes from multiple installers before making a decision.
Placement Matters: Torch Layout for Ambiance
Strategic torch placement can dramatically enhance the ambiance of your patio. Think about using torches to define different zones within your outdoor space. Place them along pathways to create a welcoming glow and guide guests safely. Use torches to highlight seating areas, creating a cozy and inviting atmosphere. Consider using varying torch heights to add visual interest.
Torches can also be used to create focal points. A single, larger torch or a grouping of torches can draw the eye and add a dramatic touch. Avoid overcrowding your patio with torches – you want to create a relaxed and inviting atmosphere, not a blinding spectacle. Too much light can actually detract from the ambiance.
The size and shape of your patio will influence your torch layout. A small patio might only accommodate a few strategically placed torches, while a larger patio can handle a more elaborate arrangement. Experiment with different layouts to find what works best for your space. Consider the surrounding landscape and how the torchlight will interact with it.
Maintaining Your Torches: Long-Term Care
Proper maintenance is essential for ensuring your patio torches last for years to come. Regularly clean the torch containers to remove dirt, debris, and residue. Trim the wicks to maintain a consistent flame height. Store fuel in a cool, dry place, away from direct sunlight and heat. H Potter’s blog offers helpful tips and advice on torch maintenance and care.
Rust and corrosion can be a problem, especially in humid climates. Protect your torches by applying a rust-resistant coating or sealant. Inspect the torches regularly for any signs of damage and repair them promptly. Properly dispose of old fuel according to local regulations.
Before storing your torches for the winter, thoroughly clean them and ensure they are completely dry. Cover them to protect them from the elements. Replace any worn-out parts, such as wicks or fuel canisters, before the next season. A little maintenance will go a long way in preserving your investment.
Patio Torch Fuel Comparison - Choosing What's Right for Your Space (2026)
| Fuel Type | Burn Time | Scent | Cost | Mosquito Repellency | Environmental Impact |
|---|---|---|---|---|---|
| Citronella | Medium | Strong 🍋 | Low | Effective | Medium |
| Paraffin | Medium | None | Low | Limited | Medium-High |
| Gel | Long | Mild | Medium | Moderate | Medium |
| Propane | Long | None | High | Moderate | Medium |
| Lamp Oil (refined kerosene) | Medium-Long | None | Medium | Limited | High |
| Bioethanol | Short-Medium | None | High | Limited | Low-Medium |
Illustrative comparison based on the article research brief. Verify current pricing, limits, and product details in the official docs before relying on it.


No comments yet. Be the first to share your thoughts!